Grips for Tensile Testing Machines: Types, Applications & Complete Guide
In any tensile testing system, the load cell, extensometer, and machine frame often get the most attention. But in actual practice, the grips are the heart of a reliable tensile test. They determine whether your specimen stays firmly held throughout the test, whether the load is transferred accurately, and whether the final results—tensile strength, elongation, yield point—are valid.
Even the best universal testing machine (UTM) cannot deliver accurate results if the sample slips, breaks outside the gauge length, or gets damaged due to incorrect gripping. That is why choosing the right grip for the right material is essential.
This guide covers everything you need to know about tensile testing grips—their purpose, types, applications, selection criteria, and step-by-step testing guidance.

1. Why Grips Are Important in Tensile Testing
Although tensile testing seems simple—pull a material until it breaks—the challenge lies in how the material is held. Incorrect gripping leads to:
- Slippage of the sample
- Uneven load distribution
- Premature failure near the jaws
- Incorrect elongation readings
- Invalid stress–strain curve
Grips ensure:
- The specimen is held securely
- Load is transferred uniformly
- No additional stress concentrations are introduced
- No slippage occurs during high elongation
- The specimen breaks at the correct gauge length
Because every material behaves differently under tension, a single type of grip cannot work for all samples. Hence, manufacturers, labs, and QC teams must choose the correct grip per test standard (ASTM, ISO, IS, IEC, etc.).
2. How Grips Work – Basic Principle
A tensile testing grip has two main purposes:
- Hold the sample firmly without causing damage.
- Transfer tensile force from the machine to the sample consistently.
Most grips work using:
- Mechanical tightening
- Wedge/self-tightening action
- Pneumatic pressure
- Hydraulic clamping
- Special locking jaws
The choice depends on the shape, strength, thickness, and surface finish of the specimen.
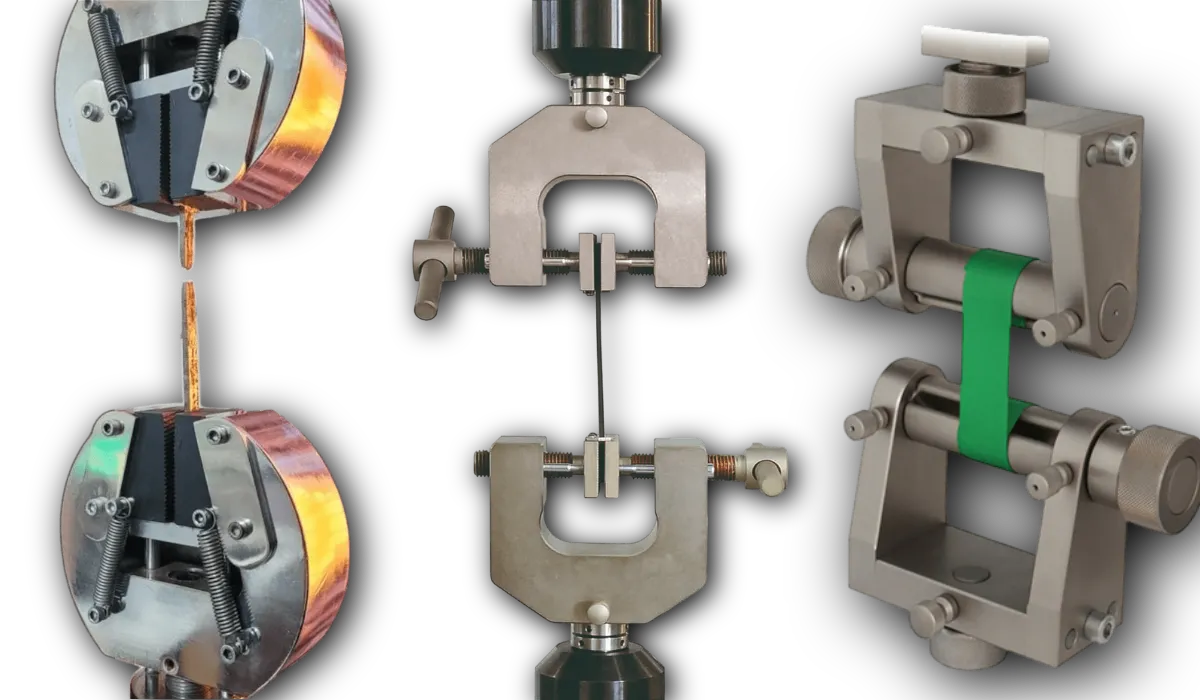
3. Types of Grips for Tensile Testing Machines
This is the most important section—understanding which grip is used for which material/application.
We’ll cover:
- Wedge Grips
- Pneumatic Grips
- Mechanical Screw Grips
- Hydraulic Grips
- Vise (Vice) Grips
- Capstan Grips
- Compression / Shear Grips (special cases)
- Peel, Tear & Puncture Grips (special applications)
- Special Grips for Wire, Rope & Cable
- Custom and Application-Specific Grips
Let’s go through each type in detail.
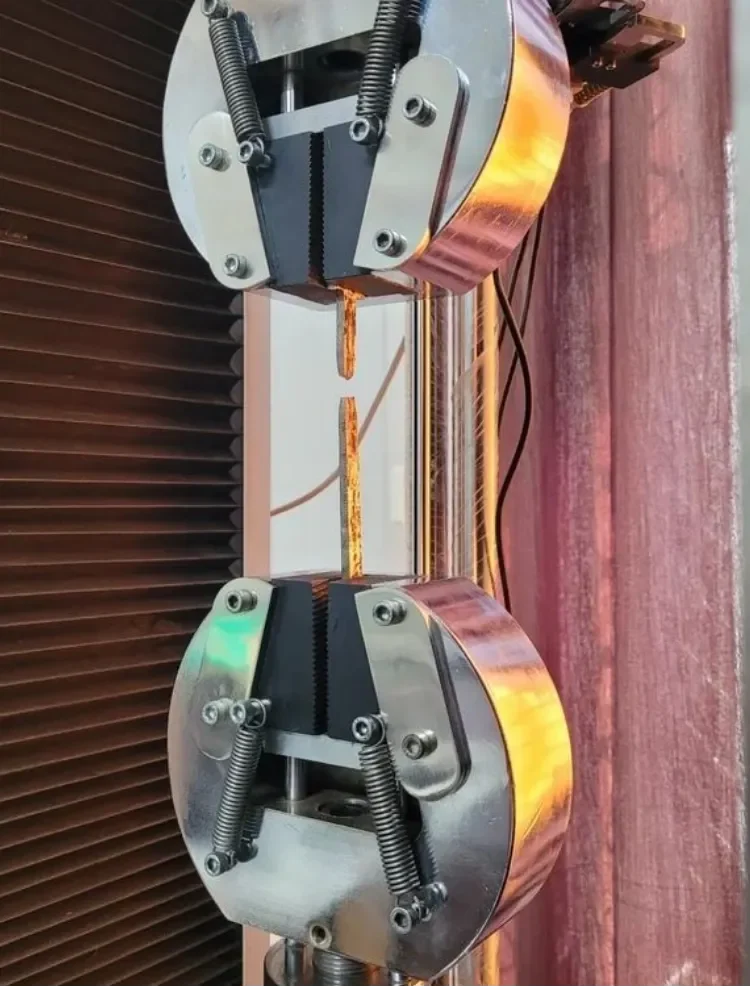
4. Wedge Grips (Self-Tightening Grips)
Wedge grips are the most common and versatile grips used worldwide.
How They Work
The jaws move inward as tensile load increases. The more load applied, the tighter they grip—ensuring self-tightening action.
Best For
- Metals (steel, copper, aluminum)
- Hard plastics
- Composite materials
- Specimens with minimal elongation
When to Use
Use wedge grips when:
- High load capacity is required (50 kN – 600 kN)
- The sample has a high modulus
- You want a secure hold without pneumatic/hydraulic systems
Advantages
- High gripping force
- Reliable for rigid materials
- Works with flat and round samples
Disadvantages
- May crush soft materials
- Not ideal for highly elastic specimens
5. Pneumatic Grips
How They Work
These grips use compressed air to apply uniform pressure on the specimen. Pressure can be adjusted precisely.
Best For
- Soft materials
- Rubber, elastomers
- Plastic films
- Paper, textiles
- Flexible packaging
- Medical tubing
When to Use
Use pneumatic grips when:
- Consistent clamping pressure is required
- Testing thin, delicate, or elastic materials
- Repetitive testing demands quick jaw operation
Advantages
- Uniform pressure on sample
- Avoids stress concentration
- No damage to the sample
- Very fast operation
Disadvantages
- Not suitable for very high loads
- Requires an air compressor
6. Mechanical Screw Grips
How They Work
The operator tightens the jaws manually using a screw mechanism.
Best For
- General-purpose tensile testing
- Plastics, rubber (low hardness)
- Soft metals
- Small components
When to Use
Ideal when:
- Budget is limited
- Lower frequency of testing
- Medium load capacity is needed
Advantages
- Affordable and simple
- Good for small labs and universities
Disadvantages
- Slower than pneumatic
- Clamping force depends on operator skill
7. Hydraulic Grips
How They Work
Hydraulic fluid generates very high clamping force—ideal for high-strength materials.
Best For
- Steel rods
- Steel plates
- Aerospace materials
- Composite laminates (high strength)
- High-capacity universal testing machines (UTMs)
When to Use
Use hydraulic grips when:
- Tensile load exceeds 300 kN
- Sample slippage is a concern
- You need perfect alignment with high force
Advantages
- Extremely high gripping force
- Very reliable for rigid materials
Disadvantages
- Expensive
- Requires hydraulic power unit
8. Vise (Vice) Grips
How They Work
Clamp the specimen like a conventional vice using a tightening screw.
Best For
- Rigid materials with rectangular cross-section
- Plastics
- Light metal samples
Advantages
- Cheap and simple
- Reliable for low-load testing
Disadvantages
- Not self-tightening
- Limited to small loads
9. Capstan Grips
How They Work
The specimen is wrapped around a rotating drum (capstan). This reduces slippage by distributing load over a larger surface.
Best For
- Yarn, textiles
- Ropes, threads
- Fiber bundles
- Cables
- Rubber strips
- Tapes
When to Use
Perfect for materials where:
- Grip-induced breaking is common
- Sample is flexible and elongated
Advantages
- Zero slippage
- Prevents premature breaks at gripping area
- Gentle on fragile samples
Disadvantages
- Not suitable for rigid materials
10. Peel, Tear & Puncture Grips
These grips are made for special tests.
Peel Grips (90° / 180° Peel Tests)
Best for:
- Adhesive tapes
- Laminated films
- Foils
- Sticker labels
Tear Grips
Used for:
- Rubber sheets
- Plastic films
- Paper
Puncture / Needle Grips
Used for:
- Medical needles
- Packaged materials
- Soft materials testing
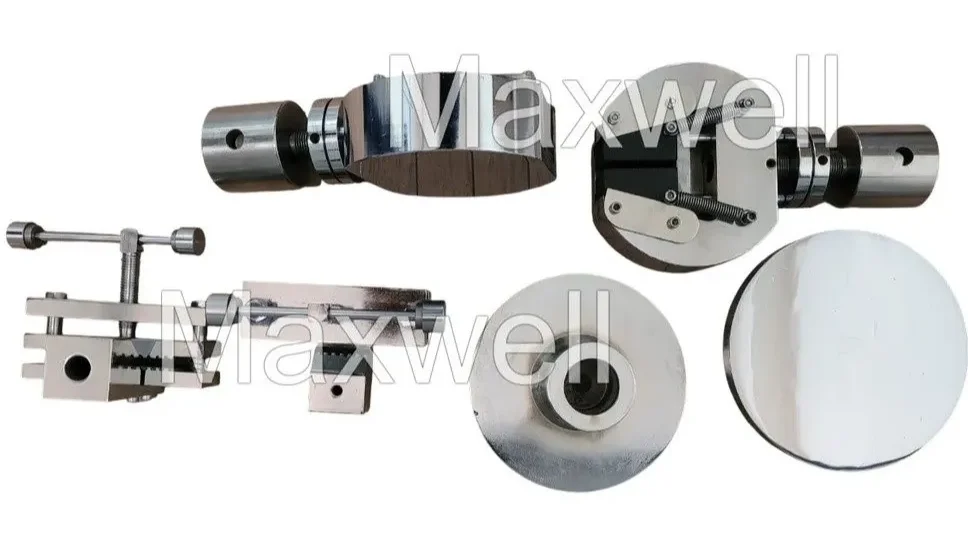
11. Specialized Grips for Wire, Rope & Cable
Cables slip easily under tension. They require specially designed grips such as:
Wedge Wire Grips
For stranded copper/aluminum cables.
Self-Tightening V-Grips
For wires under 1 mm to 5 mm.
Capstan Rope Grips
For large-diameter ropes.
Crimp Grips
For terminals, lugs, and connectors.
Why These Are Needed
Normal grips damage or cut the cable, causing premature failure. Wire grips distribute force smoothly.
12. Compression & Shear Grips (Special Cases)
Though not purely “grips,” UTMs also use:
Compression Platens
For:
- Rubber blocks
- Foam
- Plastic components
Shear Fixtures
For:
- Adhesive tests
- Laminates
13. How to Select the Right Grip – Checklist
Choosing the correct grip ensures accurate and repeatable results. Follow this selection checklist:
1. Material Type
- Metal → Wedge/Hydraulic
- Plastic → Screw/Pneumatic
- Rubber → Pneumatic
- Wire/Rope → Capstan/Wire Grip
- Film/Paper → Pneumatic
2. Sample Thickness
Thin → Pneumatic
Thick → Wedge
3. Expected Elongation
High elongation → Pneumatic or Capstan
Low elongation → Wedge or Hydraulic
4. Load Capacity
Low (up to 1 kN) → Screw/Pneumatic
Medium (1–50 kN) → Pneumatic/Wedge
High (50–600 kN) → Hydraulic/Wedge
5. Surface Finish
Smooth → Pneumatic with rubber jaws
Hard → Wedge with serrated jaws
6. Testing Standards (ASTM, ISO, IS)
Always match grips to the relevant standard:
- ASTM D412 – Rubber tensile test → Pneumatic grips
- ASTM D638 – Plastic tensile → Wedge or Screw grips
- IS 1608 – Metal tensile → Wedge/Hydraulic grips
- ASTM D882 – Film tensile → Pneumatic grips
14. Step-by-Step Tensile Testing Procedure (With Correct Gripping)
Step 1: Choose the Correct Grip
Select grip based on material and standard.
Step 2: Install the Grip on the Machine
Ensure proper alignment to avoid bending load.
Step 3: Insert the Specimen
Make sure the sample is perfectly vertical.
Step 4: Apply Initial Clamping Pressure
- Pneumatic → Set air pressure
- Wedge → Hand tighten
- Hydraulic → Activate hydraulic pressure
Step 5: Zero the Machine & Extensometer
Step 6: Start the Test
Machine pulls sample at defined speed.
Step 7: Monitor Slippage
If slippage occurs:
- Increase pressure
- Change jaws
- Use correct grip type
Step 8: Note Break Location
Valid break → Within gauge length
Invalid break → Near jaws → Change grip
Step 9: Save Results
Stress-strain graph, tensile strength, yield point, elongation, modulus.
15. Common Gripping Problems & Solutions
| Problem | Reason | Solution |
|---|---|---|
| Slippage | Wrong grip | Use pneumatic/capstan |
| Sample damaging | Serrated jaws | Switch to rubber-coated jaws |
| Premature break | Stress at grips | Better alignment, correct grip |
| Uneven holding | Wrong jaw shape | Use jaws matching sample shape |
| Operator-dependent results | Screw grips | Move to pneumatic grips |
16. Comparison Table – Which Grip for Which Material
| Material | Recommended Grip | Reason |
|---|---|---|
| Metals | Wedge / Hydraulic | High strength, rigid |
| Plastics | Screw / Pneumatic | Medium strength |
| Rubber | Pneumatic | Uniform pressure |
| Films | Pneumatic | Cannot tolerate serrated jaws |
| Textiles | Capstan | Prevents break at jaw |
| Wire | Wire grip / capstan | Prevents cutting |
| Cable | Wedge cable grip | Strong hold |
| Tape / Adhesive | Peel grips | Standard compliance |
17. Jay Types (Jaw Options)
- Serrated metal jaws → For metals
- Rubber-coated jaws → For soft materials
- Pyramid jaws → For round samples
- V-groove jaws → For wires and thin rods
- Flat jaws → For plates and sheets
18. Maintenance of Grips
- Clean jaws after each use
- Replace worn serrations
- Lubricate mechanical parts
- Check pneumatic systems for leaks
- Inspect hydraulic lines annually
19. Conclusion
Choosing the right grip is not optional—it is the foundation of accurate tensile testing. Whether you’re testing metals, plastics, rubber, cables, or films, the grip must match:
- The material’s mechanical behavior
- Test standard requirements
- Load capacity of the machine
- Shape and thickness of the sample
Correct grips ensure:
- Zero slippage
- No premature breaks
- Accurate tensile values
- Reliable and repeatable results
If you are planning tensile testing for manufacturing, R&D, or quality control, choosing high-quality grips designed for your exact sample type is the smartest investment you can make.